No-Bake Chocolate Cheesecake
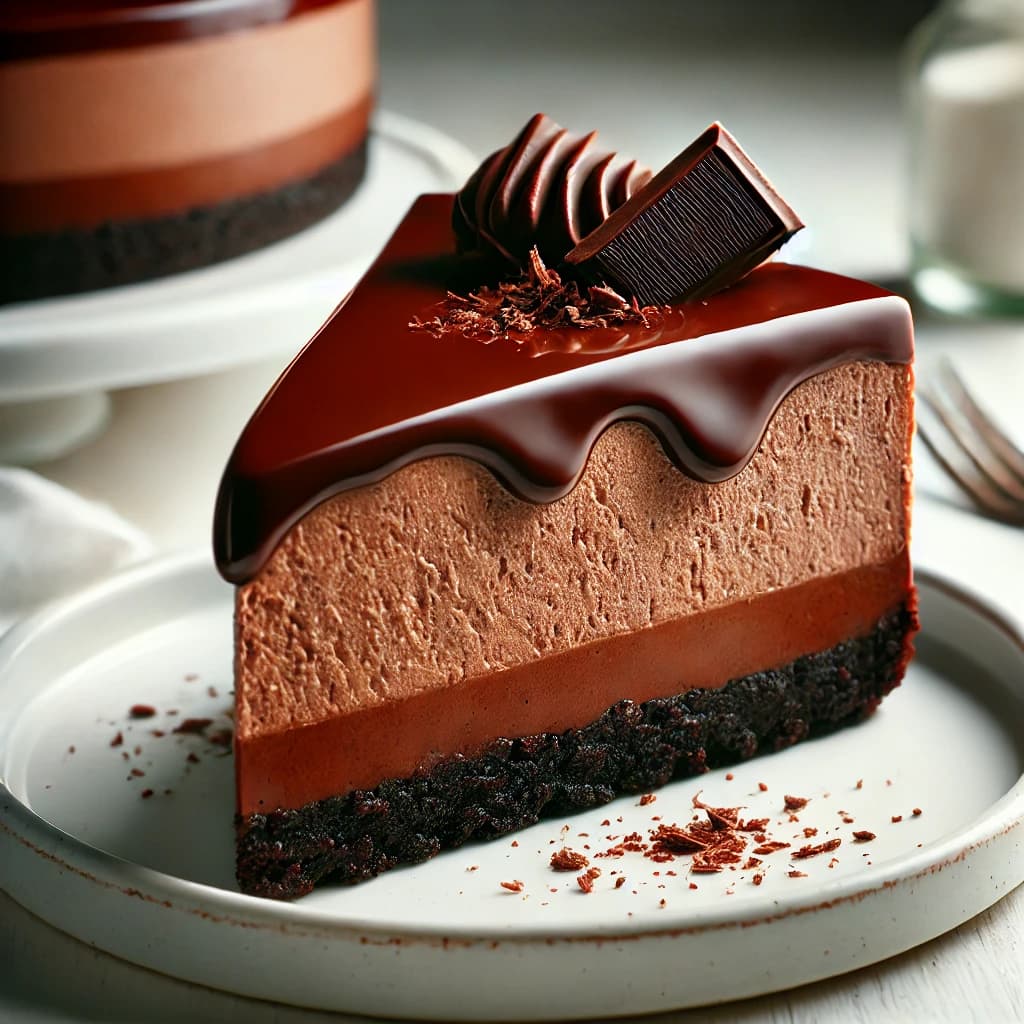
Indulge in a rich, creamy, and decadent dessert with this No-Bake Chocolate Cheesecake. Perfect for any chocolate lover, it combines a smooth chocolate filling with a buttery graham cracker crust without needing an oven. It’s an ideal dessert for special occasions or whenever you crave a luxurious treat.
Ingredients
- 2 cups graham cracker crumbs (You can use chocolate graham crackers for extra chocolate flavor)
- 1/2 cup unsalted butter, melted (Margarine or coconut oil works as dairy-free alternatives)
- 1/4 cup granulated sugar (Brown sugar can be used for a richer taste)
- 16 oz cream cheese, softened (Ensure it’s at room temperature for a smooth texture)
- 1 cup powdered sugar (Sifted to avoid lumps)
- 1 tsp vanilla extract (Enhances the chocolate flavor)
- 1 cup heavy cream, whipped (For a lighter, airy texture)
- 1 1/2 cups semi-sweet chocolate chips, melted and cooled slightly (Use high-quality chocolate for best results)
- 1 cup semi-sweet chocolate chips (Provides a smooth, glossy finish)
- 1/2 cup heavy cream (Heated until just boiling)
The Recipe No-Bake Chocolate Cheesecake

No-Bake Chocolate Cheesecake
Ingredients
- 2 cups graham cracker crumbs Can use chocolate graham crackers for extra chocolate flavor
- 1/2 cup unsalted butter melted (Margarine or coconut oil works as dairy-free alternatives)
- 1/4 cup granulated sugar Brown sugar can be used for a richer taste
- 16 oz cream cheese softened (Ensure it’s at room temperature for a smooth texture)
- 1 cup powdered sugar Sifted to avoid lumps
- 1 tsp vanilla extract Enhances the chocolate flavor
- 1 cup heavy cream whipped (For a lighter, airy texture)
- 1 1/2 cups semi-sweet chocolate chips melted and cooled slightly (Use high-quality chocolate for best results)
- 1 cup semi-sweet chocolate chips Provides a smooth, glossy finish
- 1/2 cup heavy cream Heated until just boiling
Instructions
- In a mixing bowl, combine the graham cracker crumbs, melted butter, and granulated sugar. (Mix until the crumbs are evenly coated)
- Press the mixture firmly into the bottom of a 9-inch springform pan. (Use the back of a spoon or a measuring cup to pack it down tightly)
- Refrigerate while preparing the filling. (This helps set the crust)
- In a large bowl, beat the softened cream cheese until smooth and creamy. (An electric mixer is recommended for best results)
- Gradually add the powdered sugar and vanilla extract, beating until fully combined. (Scrape down the sides of the bowl as needed)
- Fold in the melted chocolate until fully incorporated. (Ensure the chocolate is cool to avoid melting the cream cheese)
- Gently fold in the whipped cream until the mixture is smooth and fluffy. (Be careful not to overmix)
- Spread the chocolate cheesecake filling evenly over the prepared crust. (Use a spatula to smooth the top)
- Refrigerate for at least 4 hours, or overnight, until firm. (Chilling helps the cheesecake set properly)
- In a small saucepan, heat the heavy cream until just boiling. (Do not let it boil over)
- Pour the hot cream over the chocolate chips in a heatproof bowl. (Let it sit for a minute to melt the chocolate)
- Stir until smooth and glossy. (Ensure all the chocolate is melted and combined)
- Pour the ganache over the chilled cheesecake, spreading it evenly. (The ganache will set as it cools)
- Refrigerate for an additional 30 minutes to set the ganache. (This creates a beautiful, firm top layer)
- Remove the cheesecake from the springform pan and transfer it to a serving plate. (Use a warm knife to cut clean slices)
- Garnish with chocolate shavings or fresh berries if desired. (Optional but adds a nice touch)


